stevenaeola
Documentation and tutorials
node-red basics
My first flow
Once you have your node-red server started and the browser pointing at it correctly, you should have a screen looking something like this:
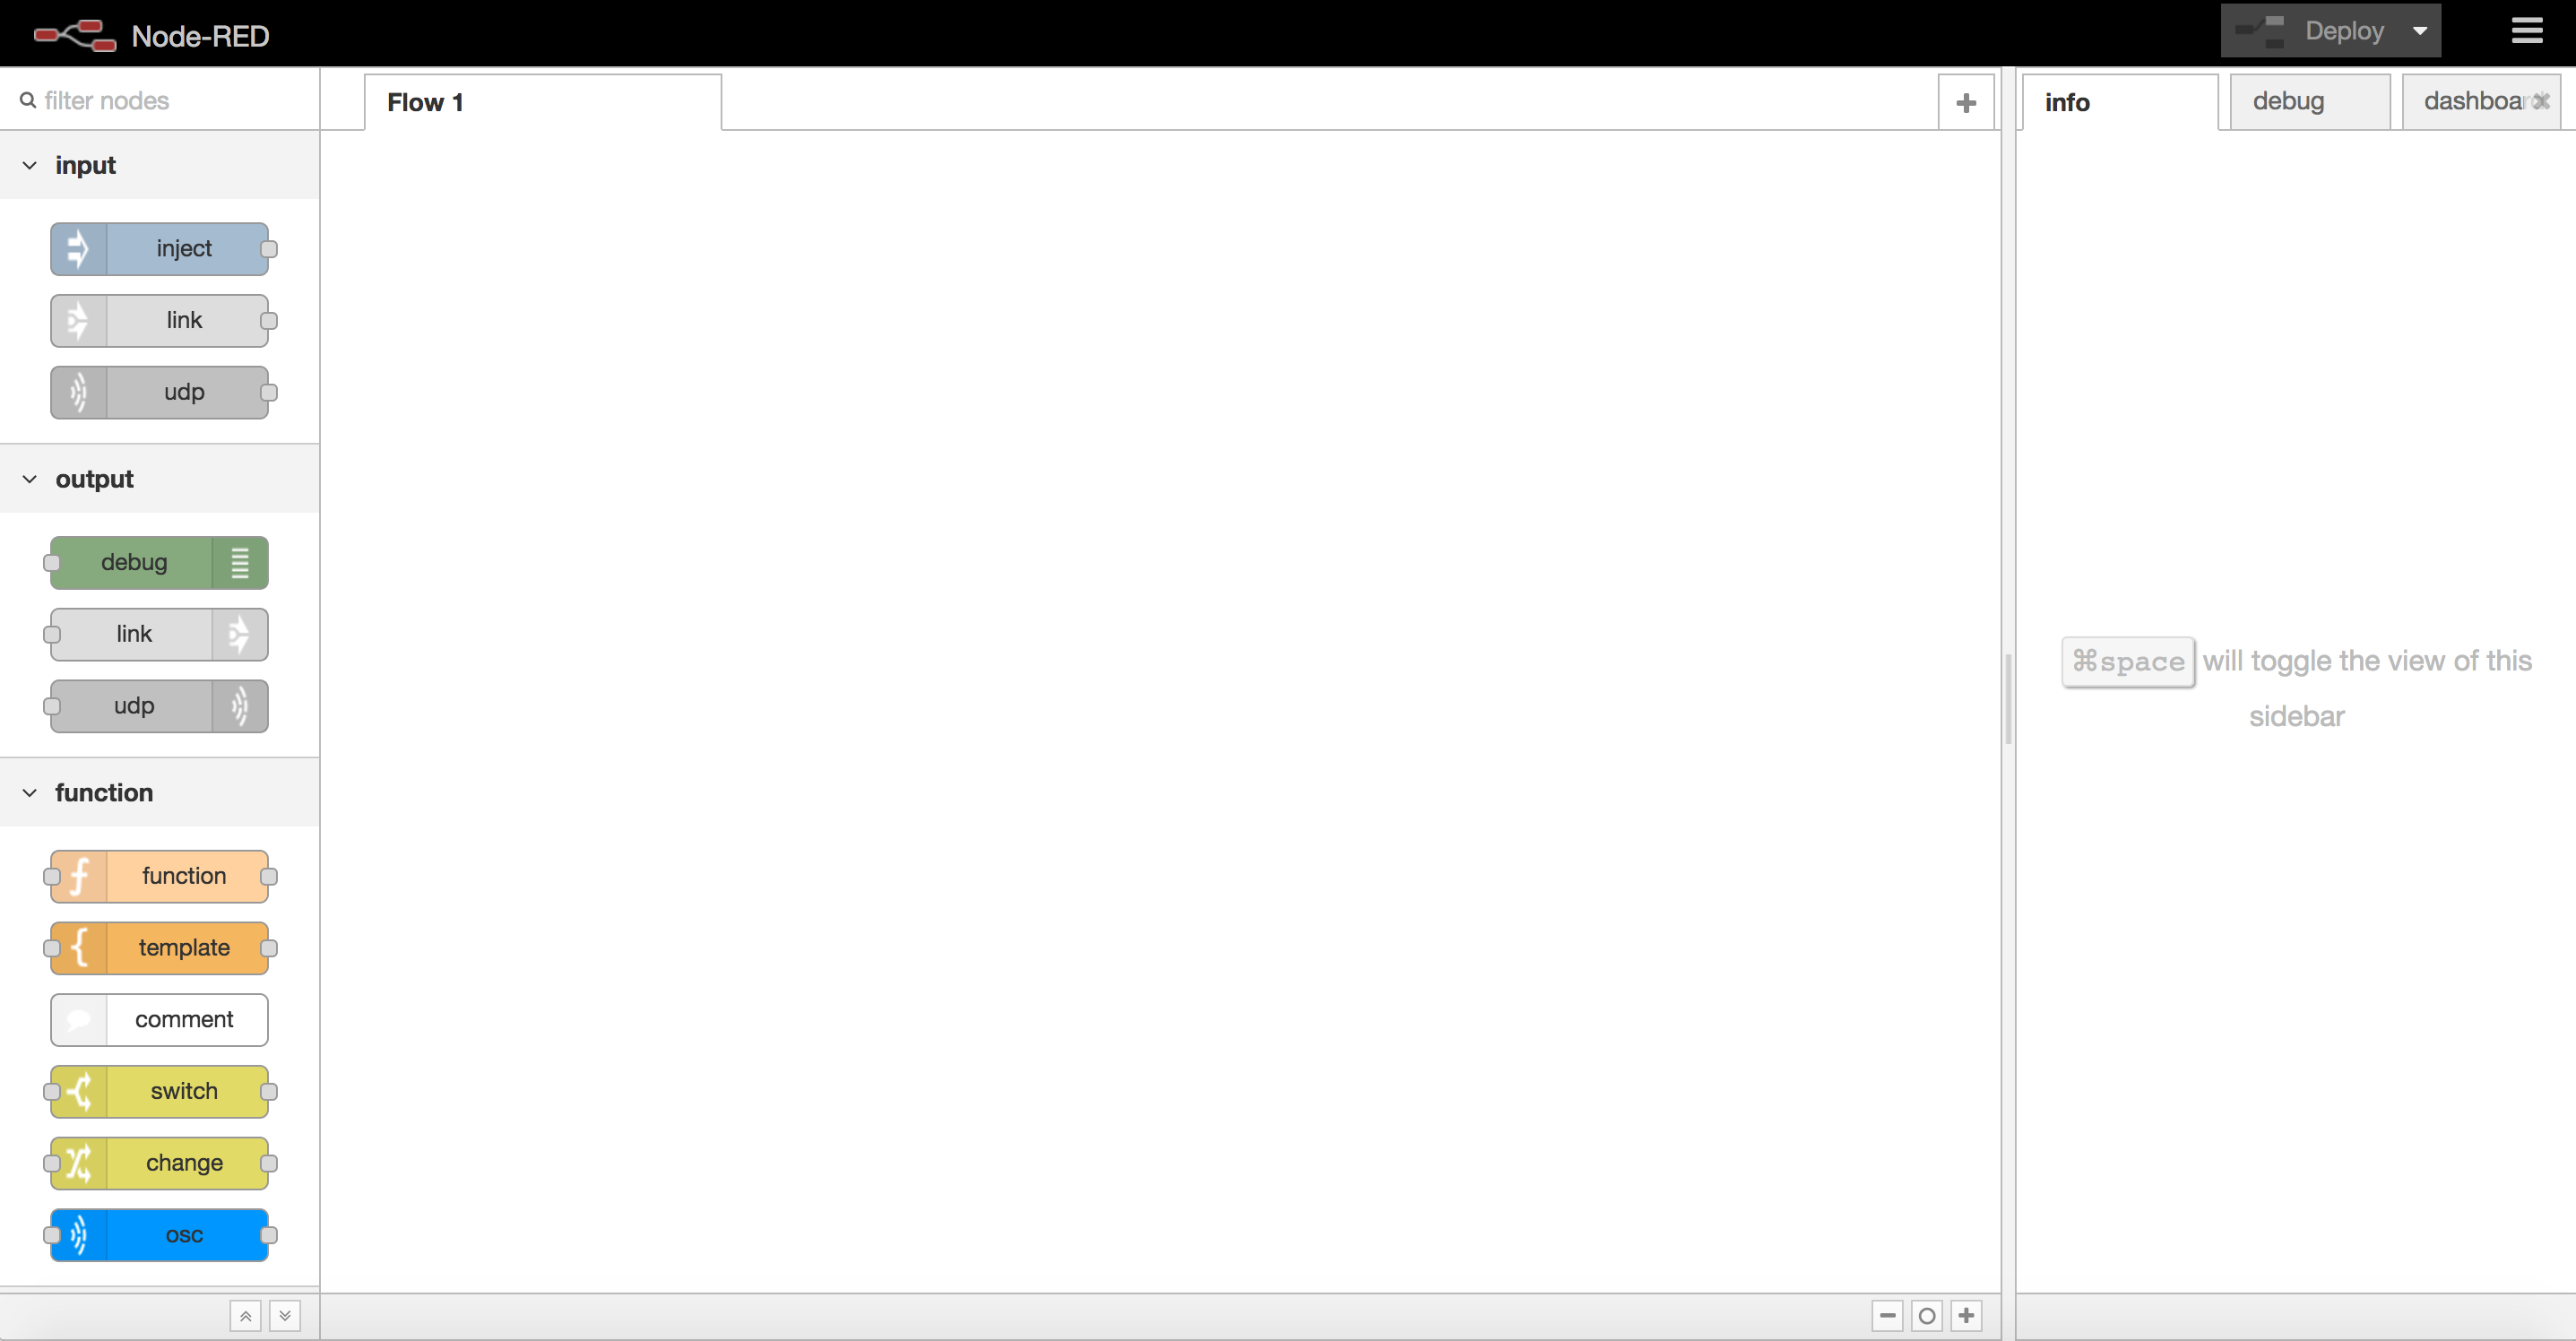
On the left-hand side is the palette, which has a list of different types of nodes you can choose to combine to make your flow (which is what node-red calls a program). You put them in the workspace for the flow (the big area in the middle, currently blank) by clicking and dragging them from the palette. Each node can have inputs and/or outputs. Inputs are on the left-hand side of the box and outputs are on the right-hand side, marked with a small rounded rectangle. Messages are passed from the output of one node to the input of another node by connecting them with wires. Our first example is going to have two nodes and one wire as follows:
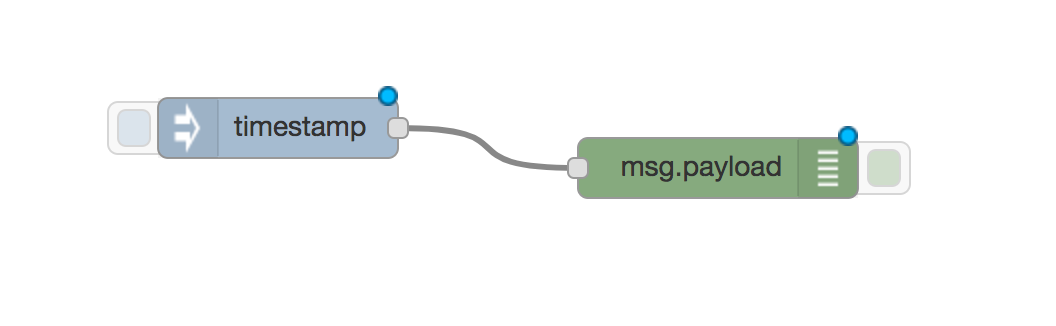
- Drag an
injectnode and adebugnode into the workspace - Add a wire from the output of the
injectnode to the input of thedebugnode by clicking on the output and dragging to the input (or anywhere on that node)
Now your workspace should contain nodes looking like this:
Making it do stuff
So far you have edited your program but it isn’t doing anything yet. At this stage the program you have written is held inside the web browser but you need to transfer it to the node-red server so that it runs and actually does stuff. This process is called deployment and you do it by clicking on the “Deploy” button near the top right hand corner which looks something like this:

If that works your program is running on the server. Every time you make a change to the program by adding or removing nodes or wires you have to deploy it again (redeploy it).
Now if you click on the larger rounded rectangle on the left hand side
of the inject node (which is now called timestamp) then the server
will send a message on to all the nodes connected to its output, which
in this case is the debug node (which is now called
msg.payload). The debug node works by taking any input messages it
receives and prints them in the debug tab in the right-hand
sidebar. The output it shows is something like this:
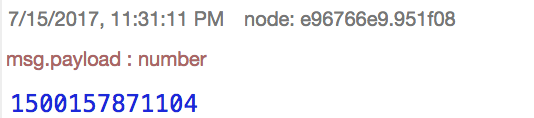
If you click on the inject button again then a new message will appear in the debug window.
Node configuration
There are at least three mysteries in what we have looked at so far:
- What are the strange numbers that appear in the debug tab?
- Why did the
injectnode change its name totimestamp? - Why did the
debugnode change its name tomsg.payload?
The first two questions we can answer at once. The most important
number in the debug tab is the payload of the message i.e. its content, which appears in blue. Each time you
send a new message a different payload will be produced. This payload
is generated by the inject node when it is clicked, and is a measure
of the current time (to be precise, it is the number of milliseconds
since the 1st January 1970). However, you can change the inject node
to send a different payload instead. You do this by configuring the
node, through double-clicking on the node and using this dialogue box
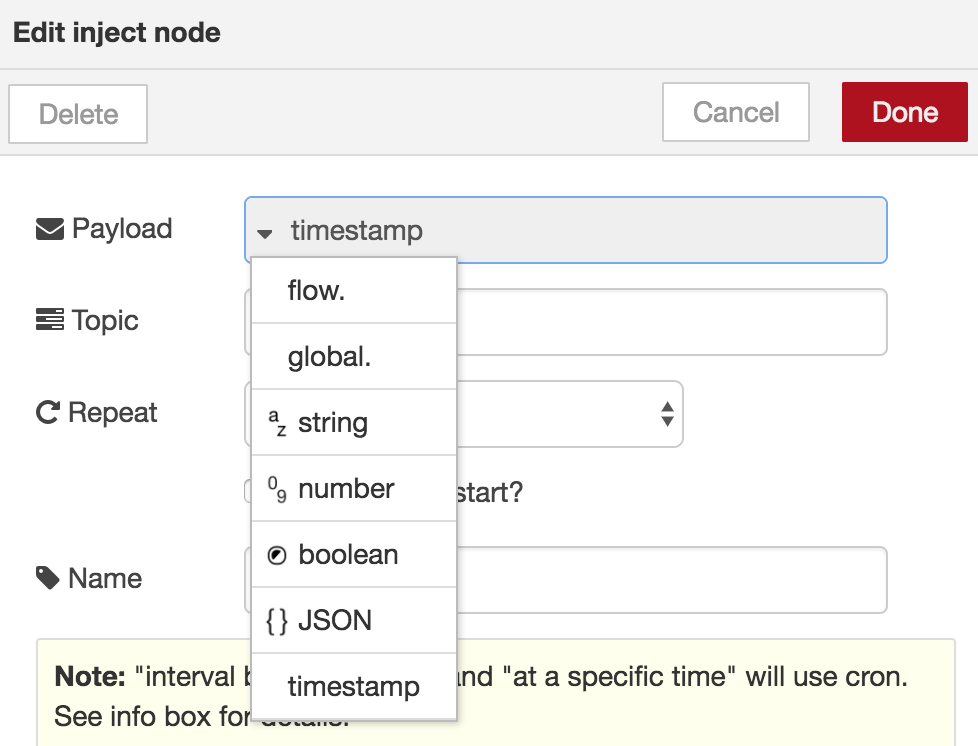
Different types of payload can be selected. By default it gives
timestamp but if you change this to string (which is a string of
characters i.e. some text) you can select what text you want to
send. This could be something friendly like “hello”. Save this with
the “Done” button and redeploy your program. Now the title of the
inject node has changed and your message can be
seen when you click on the left-hand side of it.
You can probably now guess what the solution is to the third mystery by
looking at the configuration of the debug node. At the moment it
outputs msg.payload so change that to complete msg object, redeploy
and inject some more messages to see what the output looks like. Now
you should have something like this (once you have clicked on the
little triangle to expand the text)
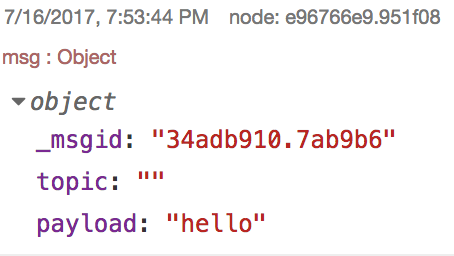
Just in case you hadn’t already worked it out, msg is short for
message, so msg.payload is the payload of the message. That is shown
by the text payload: "hello". There is also something called
_msgid which is a unique identifier for the message (usually
ignored) and something written topic: "". The quotation marks start
and finish with nothing in between, so this is what is called an empty
string. The topic is used to say what the message is about, but is
often left empty. If you go back and change the configuration of the
inject node you can add a topic, maybe to something like
greeting. By redeploying and injecting some more messages you should
see the topic being displayed.
In the object msg we have three properties, which are _msgid,
topic and payload. Messages can have as many properties as you
want, as long as each property has a different name. These properties
can also have different types. Originally the payload was a number
representing the time, now it is a string representing a greeting. If
you have built a flow that isn’t doing what you’re expecting you can
use a debug node anywhere to find out what messages are being
passed around between your nodes.
Next we are going use some other types of node specially designed for making music.